Dnet Email: iPhone Setup
Remember that you can check your email by going to email.dnet.net. If you don’t remember your password then please give us a call and we will help you reset it.
The following settings and interface should be similar for iPhones 6, 7, 8, 9, X, 11 and 12.
Step 1:
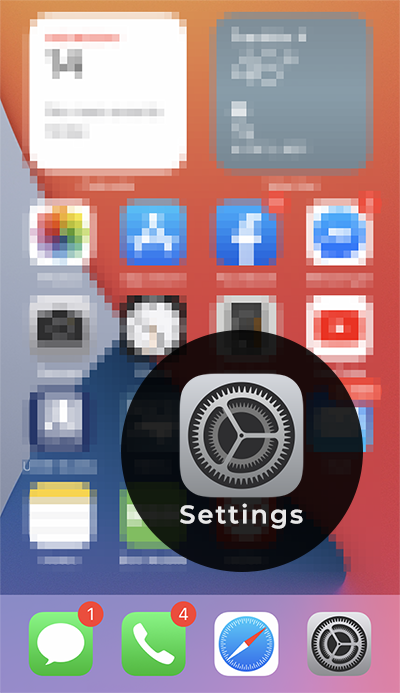
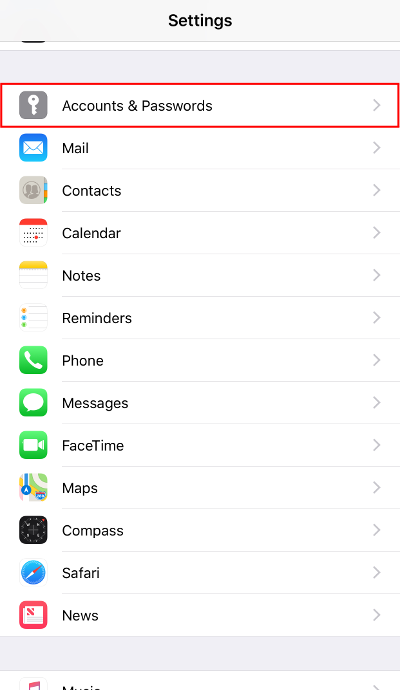
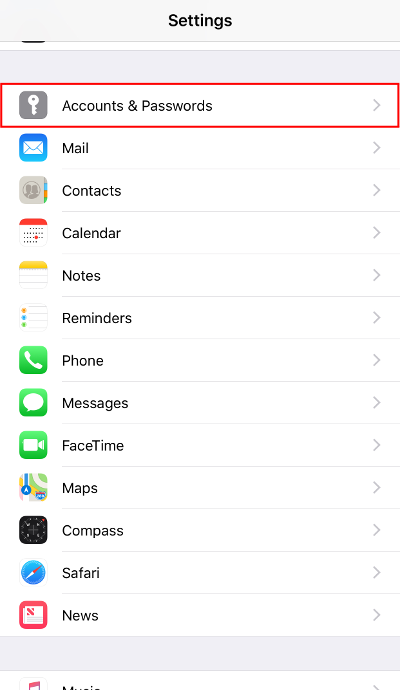
Go to Settings then press Accounts & Passwords or Mail -> Accounts if you are running the latest IOS version.
Step 2:
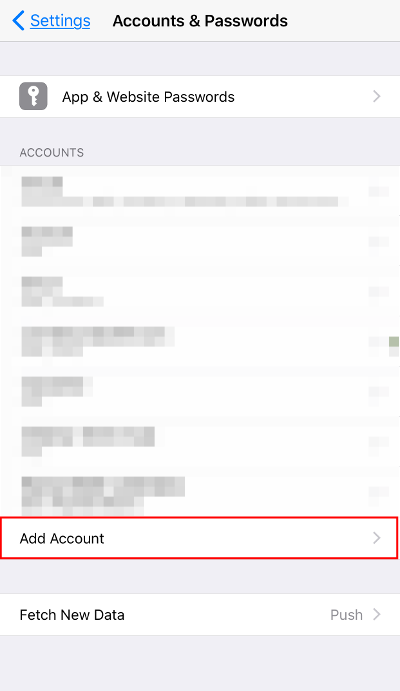
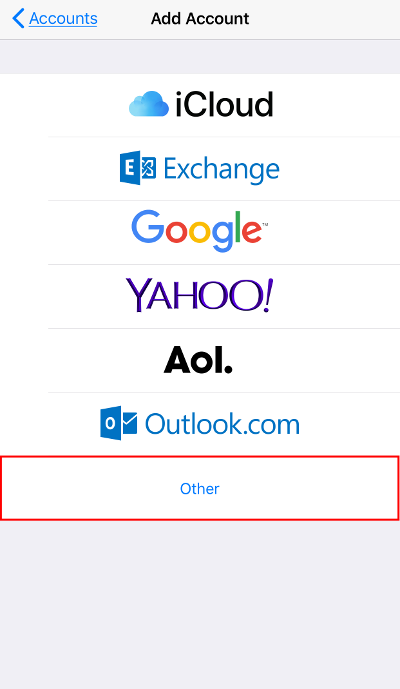
Press Add Account then choose Other.
Step 3:
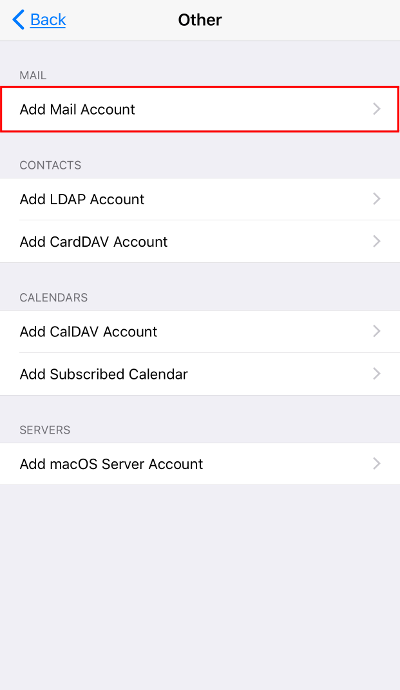
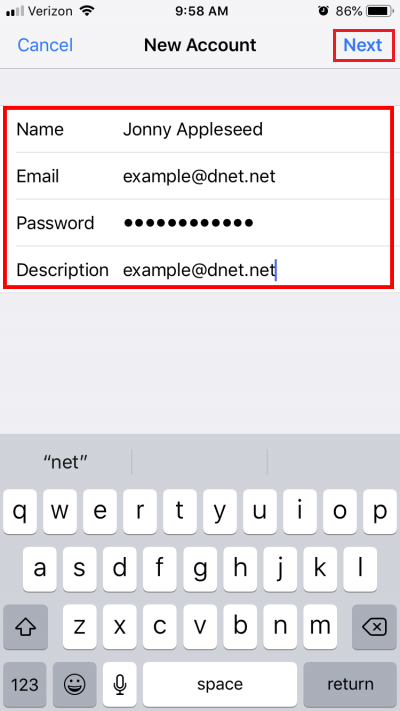
Press Add Mail Account and type in your name, email address, and password. The description is optional. Press Next.
Step 4:
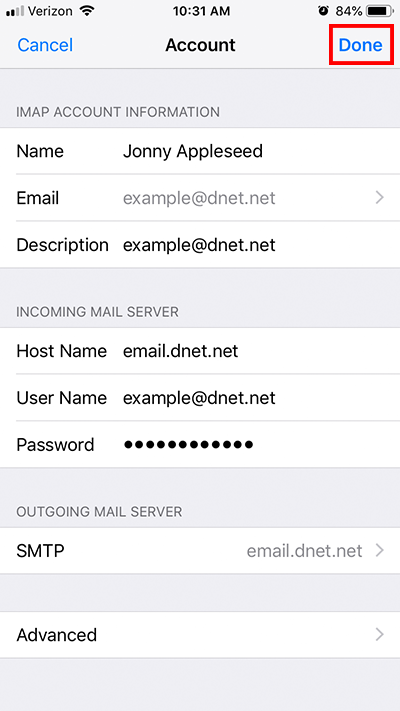
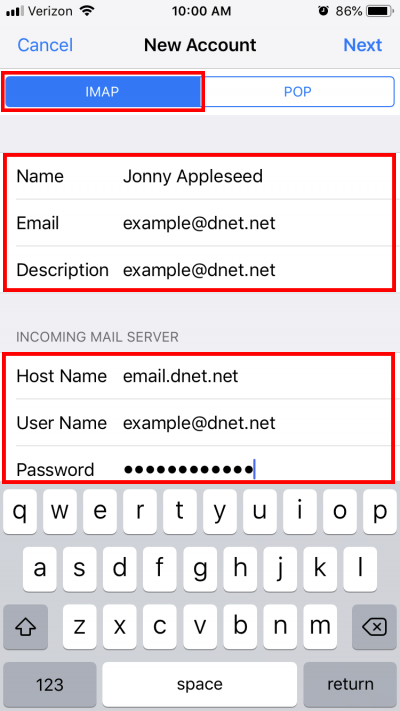
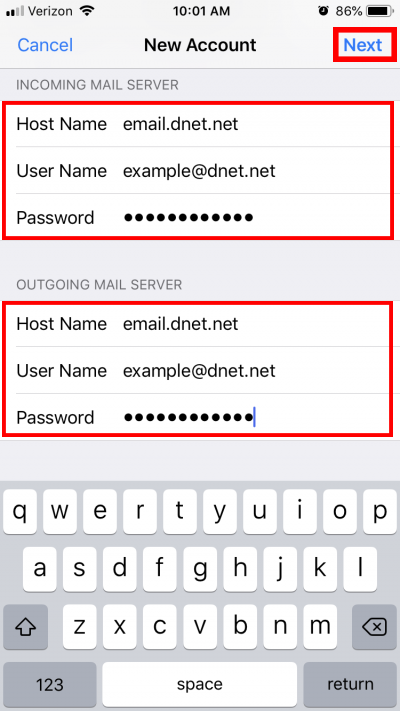
We recommend selecting IMAP for mobile devices. The Host Name is email.dnet.net and the username is your Dnet email address. Type in your password. You will be asked to type in your Host Name, User Name, and Password for both the Incoming Server and the Outgoing Server. Press Next once you are finished.
If you think your password is incorrect you can try logging into email.dnet.net or give us a call and we can reset it for you. If you run into any errors please double check spelling or missing fields. You may give us a call for further assistance 877-601-3638. If possible please take a screenshot of any error messages to better help us troubleshoot your issue.
Step 5:
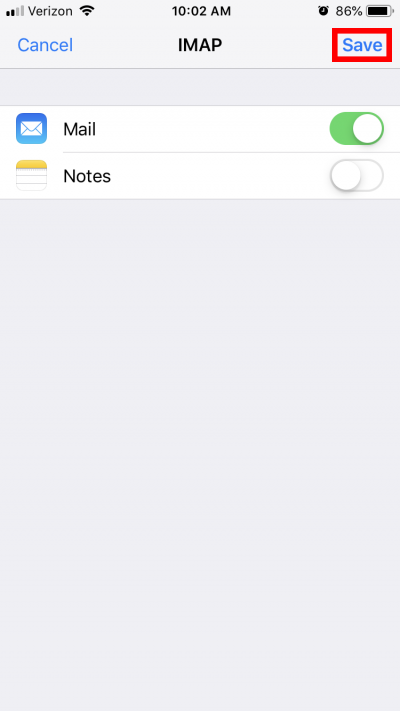
Press Save and your email setup is complete! Hurray!
You may want to edit your Incoming and Outgoing Mail Server settings below.
Edit the Incoming and Outgoing Mail Server Settings
Step 1:
Go to Settings then press Accounts & Passwords or Mail -> Accounts if you are running the latest IOS version.

Step 2:
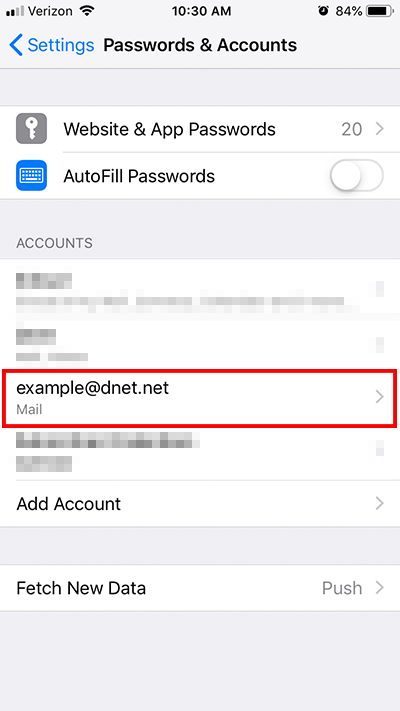
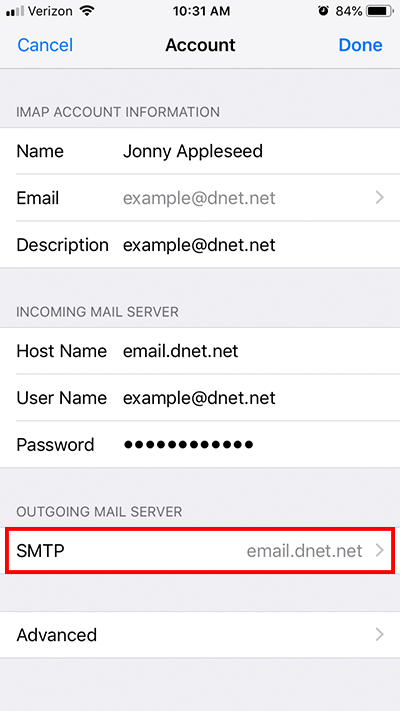
Press the Dnet email address that you wish to edit. Scroll down and press SMTP. This is the outgoing mail server.
Step 3:
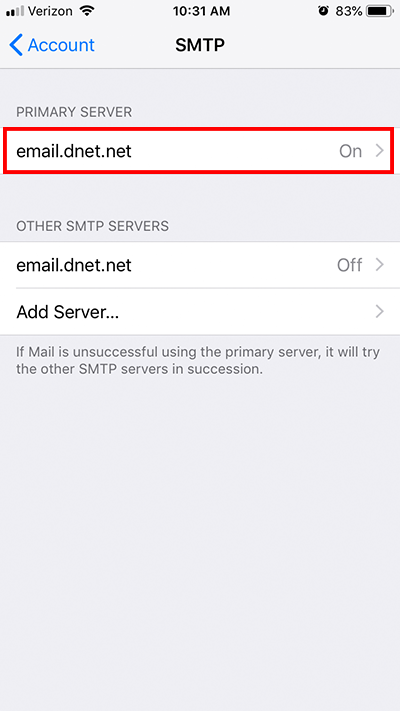
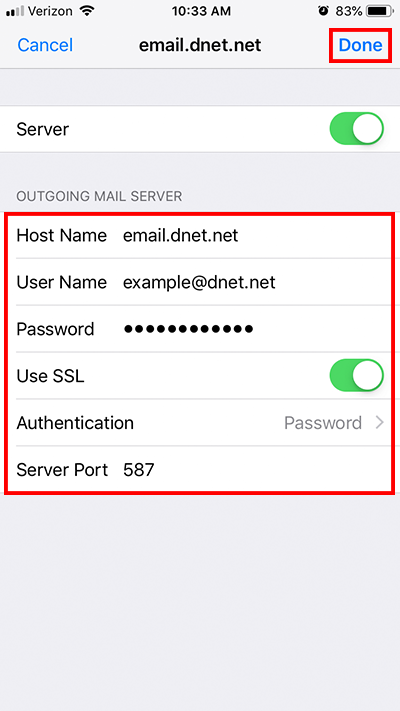
Press your Dnet email address under Primary Server. The Host name should be email.dnet.net and your User Name should be your Dnet email address. Make sure that your password is typed in. SSL should be turned on and Authentication should be Password. The Server Port should be 465 or 587. Sometimes 587 works better for Apple devices. Press Done.
Step 4:
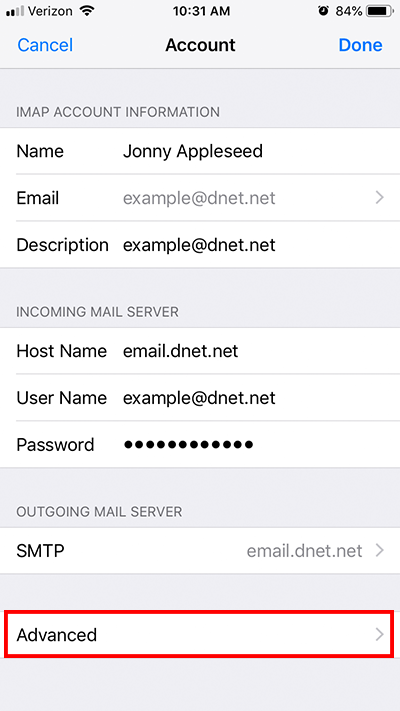
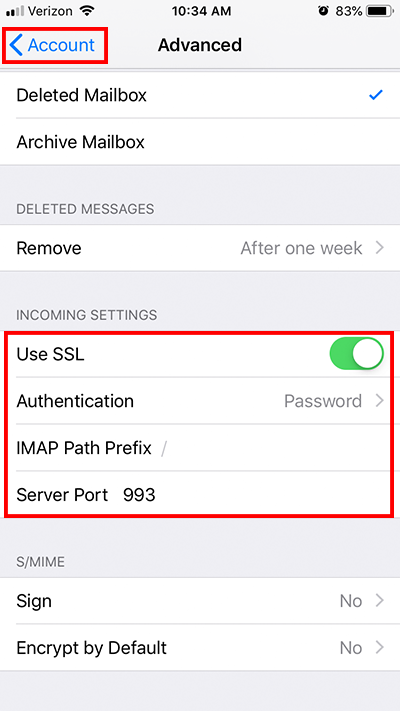
Scroll down and press Advanced. Scroll down until you see Incoming Settings and make sure that SSL is turned on, Password is selected for Authentication and the server port is 993 for IMAP. If you are using POP3 then your port number is 995. Press Account to go back.
Step 5:
Press Done and you have successfully edited your Incoming and Outgoing Mail Server Settings. Hurray!
